Streaky, Bubbly and Chipping Fast: 7 Mistakes People Make Painting Their Own Nails
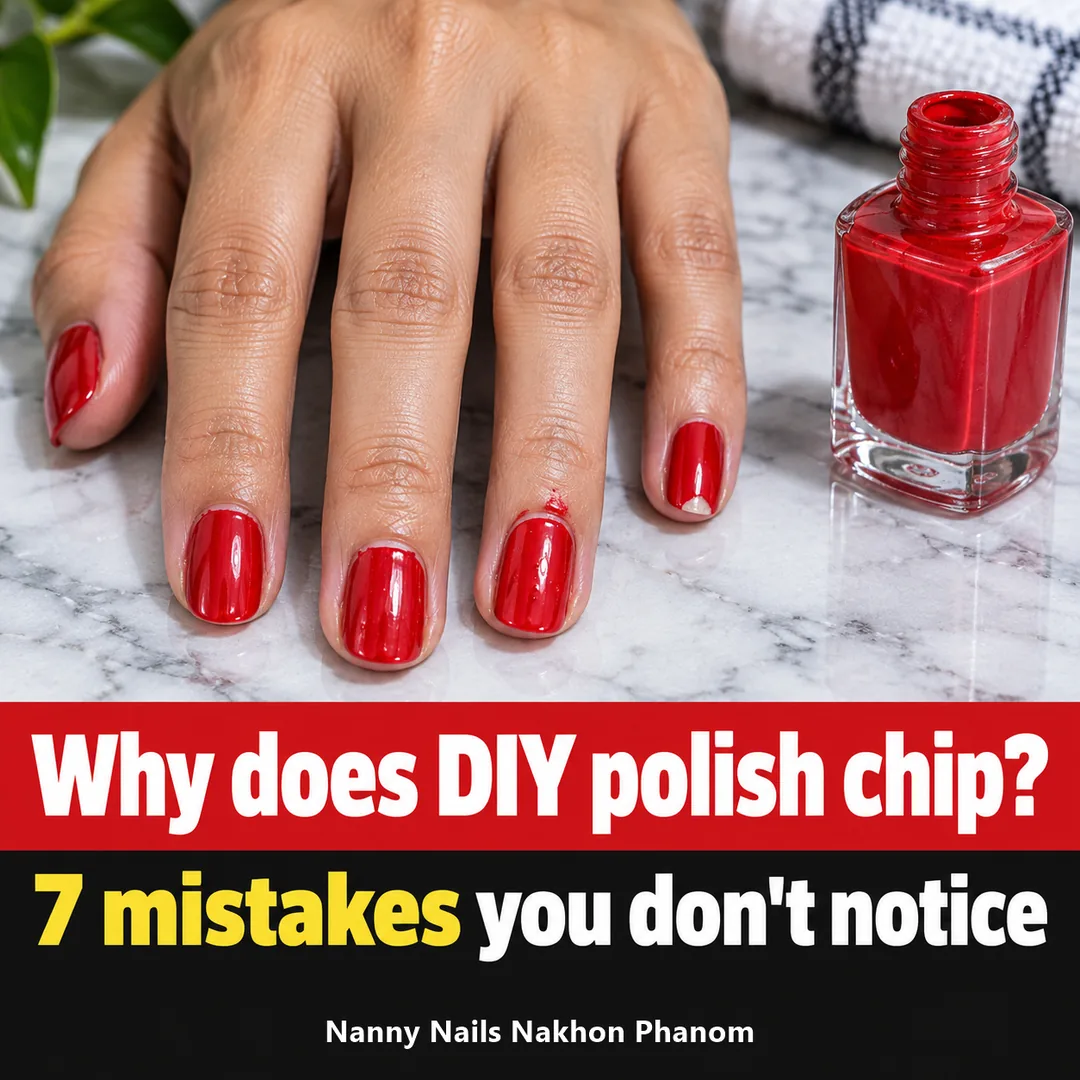
Friday night, you sit down and carefully paint your nails. Two coats to get the red nice and opaque, you wait until you think it is dry, and you go to bed. In the morning there is a print of the blanket on your nails, a few fingers have tiny bubbles, and the polish has flooded the skin at the base. After the dishes on Saturday evening the tips start to chip, and by Monday the colour is peeling off in sheets. If that sounds familiar, it does not mean you are clumsy. Most of it comes from small mistakes people make without noticing. This article gathers the seven of them, with a fix for each, so next time your own manicure looks smooth, neat and lasts longer.
A quick honest note before we start. Regular polish painted at home will not last a month even if you get every step right. It dries by evaporating in the air, so the film is thinner and softer than gel polish, which is hardened under a lamp. But the difference between polish that peels on day two and polish that stays neat for several days comes down almost entirely to the seven points below, and every one of them can be fixed with what you already have at home.
What does a bad DIY paint job look like?
DIY polish problems come in only a few forms. Knowing which one you have tells you which step to fix.
- Streaks and patches. The colour is uneven, you can see brush lines, and some spots are so thin the nail shows through.
- Bubbles. Tiny air bubbles on the surface, sometimes popping into little pits.
- Flooded edges. Polish creeping onto the cuticle and the sides of the nail.
- Dents and marks. It looks dry, but anything that touches it leaves a fingerprint or fabric mark.
- Chipping and peeling fast. Tips chip within a day or two, or the polish lifts off in a sheet from the base.
The illustration below puts all five on one hand. The thumb is streaky, the index finger has bubbles and polish on the edges, the middle and ring fingers are chipped at the tip, and the little finger has a thick, lumpy, dented coat. See which ones you have run into.
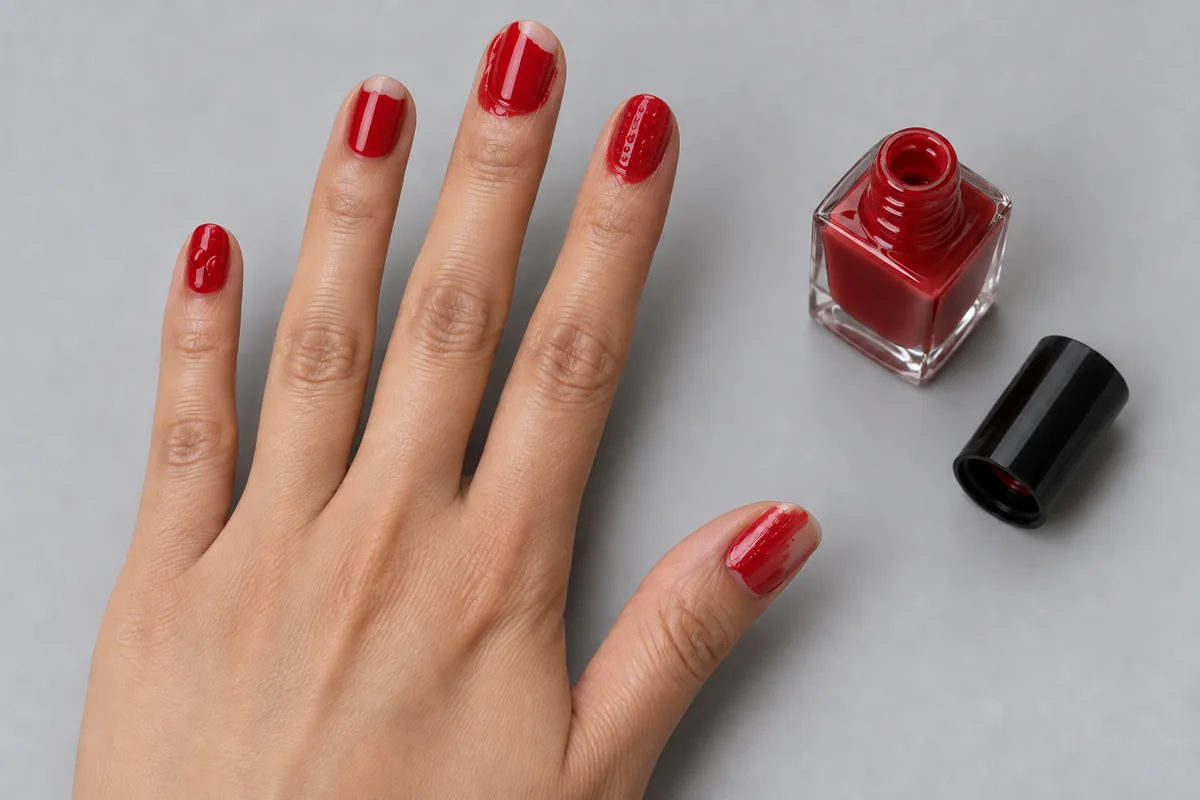
Every one of these has a cause, and several can be fixed before you even open the bottle. Let us go through them one at a time.
Mistake 1: not removing oil from the nail first
This is one of the top reasons polish comes off in a whole sheet even when it went on beautifully. Many people put on hand cream before bed and then decide to paint their nails, or have just used cuticle oil. That oil coats the nail in a film too thin to see, so the polish sticks to the oil rather than to the nail.
Nail spa owners put it simply: any trace of oil will cause polish to lift and peel. You will not see it when you have just finished, but a day or two later the edges start to lift, water gets underneath, and the polish comes away in a sheet.
The fix: wash your hands with soap, dry them completely, then wipe each bare nail with a cotton pad and polish remover before you start, right into the side grooves. Save hand cream and cuticle oil for after the polish is dry, not before. Also, if you have just showered or had your hands in water for a long time, your nails are still soft and damp. Give your hands time to dry properly first.
Mistake 2: shaking the bottle hard
You see the polish has separated, so you shake it like a bottle of syrup. Everyone does it. But shaking hard whips air into the polish, and the tiny bubbles ride out on the brush and onto your nail. When the polish dries, they stay as dots or pop into small pits that feel rough to the touch.
The fix: roll the bottle back and forth between your palms, the way you roll clay into a snake, then tip it upside down and back slowly until the colour is even again. The warmth of your hands also makes the polish flow a little more smoothly. If bubbles appear after you paint, do not add another coat to cover them. That only adds more. Wipe that nail clean with remover and paint it again. It is quicker and neater.
Mistake 3: one thick coat to get full colour
You want opaque colour fast, so you load the brush and lay down one thick coat. It sounds like it saves time, but a thick layer dries very slowly. The top skins over first while the inside is still wet, so the nail dents easily, wrinkles at the slightest touch, and traps more air bubbles than a thin coat would.
Use thin coats, two at most. Thin coats dry faster and more evenly, so two thin coats end up both more opaque and more durable than one thick one.
The fix: before lifting the brush out, wipe one side of it on the neck of the bottle so there is just enough polish for one nail. Make the first coat thin and do not worry that it is not opaque yet. Let it set, then add the second coat. Pale shades like nude or milky white often look patchy after one coat. That is normal, and the second coat evens it out.
Mistake 4: brushing back and forth too many times
Most streaks do not come from bad polish. They come from working the polish back and forth. Polish starts to dry the second it touches the nail, so every extra stroke drags colour that is already getting tacky into grooves. The more you fix it, the worse it gets. Use as few brush strokes as possible.
The fix: three strokes per coat.
- Place the brush in the middle of the nail, just above the base, and press lightly so the bristles fan out. Push it up towards the cuticle, then pull it all the way to the tip in one go.
- Start near the base again and sweep down the left side to the tip.
- Do the same on the right side.
If a spot still looks thin, leave it for the second coat to cover rather than going back while the polish is getting sticky. One more tip for your non-dominant hand: rest the hand you are painting flat on the table, prop your elbow, and turn your fingers towards the brush instead of moving the brush to your fingers. Your hand will shake far less.
Mistake 5: painting right up to the cuticle
People painting at home often worry the base of the nail will look bare, so they paint as close as they can. The polish ends up on the cuticle and the side walls. Besides looking messy, polish sitting on skin is where peeling starts, because skin moves and is naturally oily. Once the edge lifts there, water seeps under the polish and it slowly comes off in a sheet from the base.
We see exactly the same thing with gel at our salon. Gel that lifts at the base partly comes from colour climbing onto the cuticle, going past the edge of the nail onto skin, and partly from poor nail prep. Regular polish follows the same rule. To learn what gel lifting in each spot tells you, read why gel nails lift: the spot where it lifts tells you the cause.
The fix: leave a hairline gap at the base and sides. From a normal distance you can barely see it, but it keeps polish off the skin. If you have already flooded it, dip a small brush or a pointed cotton bud in remover and clean along the edge while the polish is still wet. The line sharpens up straight away. And do not cut your cuticles at home. We always tell customers not to cut the cuticle themselves, because it can damage the nail. If you want a neater base, gently push the cuticle back after a shower. Peeling skin around the nails is covered in peeling cuticles: mistakes that make it hurt.
Mistake 6: not sealing the tip
The tip of the nail takes more knocks than any other part every day: typing on your phone, opening snack bags, twisting bottle caps, washing up. If the polish stops exactly at the edge, hundreds of small impacts a day chip it away bit by bit. That is why the tips are always where chipping shows first, sometimes on day one.
The fix: after each coat, take the brush with just a little polish left on it and run it lightly across the edge of the tip, horizontally. Nail techs call this capping the free edge. The polish wraps the tip like a cap. Run the top coat across the nail edges to seal the manicure too. We see the same with gel at our salon: gel that lifts at the tip usually was not capped well, or the nail was so short that capping was difficult.
Length is the other thing people rarely think about. The longer the nail is, the more it acts like a lever, so a knock at the tip can pry it up more easily. If your goal is polish that lasts, trimming a little shorter and filing the tip into a soft curve helps a lot.
Mistake 7: using your hands before the polish is really dry
Polish dries on the surface before it dries underneath. Not sticky to the touch does not mean dry. Underneath it stays soft for longer than you would think, and the thicker the coat, the longer. That is where the blanket prints and pillowcase marks come from in the morning, and why polish dents when you grab your keys or a zip soon after painting.
Even once it has fully dried, some habits make polish chip sooner. Do not use your nails as tools, such as for opening cans, because it can cause chipping and splitting. Too much water exposure weakens nails, so wear gloves when cleaning. Polish on nails that soak in washing-up water every day wears off faster too.
The fix: paint your nails as the last task of the day, after your shower, the dishes and the housework are all done. But do not paint and then go straight to bed. Pick an early evening when you can keep watching a series for a good while. The next day, wear gloves for the dishes and use your fingertips, not your nails, to open and prise things. That alone can add several days.
What about base coat and top coat?
You may have noticed that base coat and top coat are not among the seven. That is not because they do not matter. It is because they are big enough to deserve their own article. In short: base coat helps polish grip the nail and keeps dark shades from staining it. Wearing red polish without a base coat can turn nails yellow. Top coat adds shine and protects the tips from chipping. Skip either one and polish comes off sooner.
What each bottle does, how they differ, whether one can replace the other, and when to apply them are all in base coat and top coat: what they are, can you skip them, and when to apply them. And if you have taken off a deep red and found yellow nails underneath, read dark polish turned my nails yellow.
A checklist before you open the bottle
Here are the seven points as one routine. Save it on your phone and check it each time you paint your nails.
- Shape first. File in one direction, not back and forth, because sawing back and forth weakens the tip.
- Push cuticles gently. Do not cut or pick them.
- Remove oil. Wash, dry, then wipe the nails with remover.
- Roll the bottle, do not shake it.
- Two thin coats. Wipe the brush on the bottle neck every time.
- Three strokes per coat. Middle, left, right, then stop.
- Leave a hairline gap. Clean up any flooding while it is still wet.
- Cap the tip on every coat.
- Paint last thing in the day, and give the polish time to dry properly before bed.
Painting your own toenails without the mess
Toenails follow all the same rules. What makes them harder is that toes sit close together, so polish smudges onto the next toe easily. Roll some tissue into a strip and weave it between your toes to hold them apart. Sit on the floor or a low stool so you can bring your knee up, paint from the big toe to the little toe, and wear open sandals until the polish is truly dry. Closed shoes put on too soon are the main reason toenail polish gets dented.
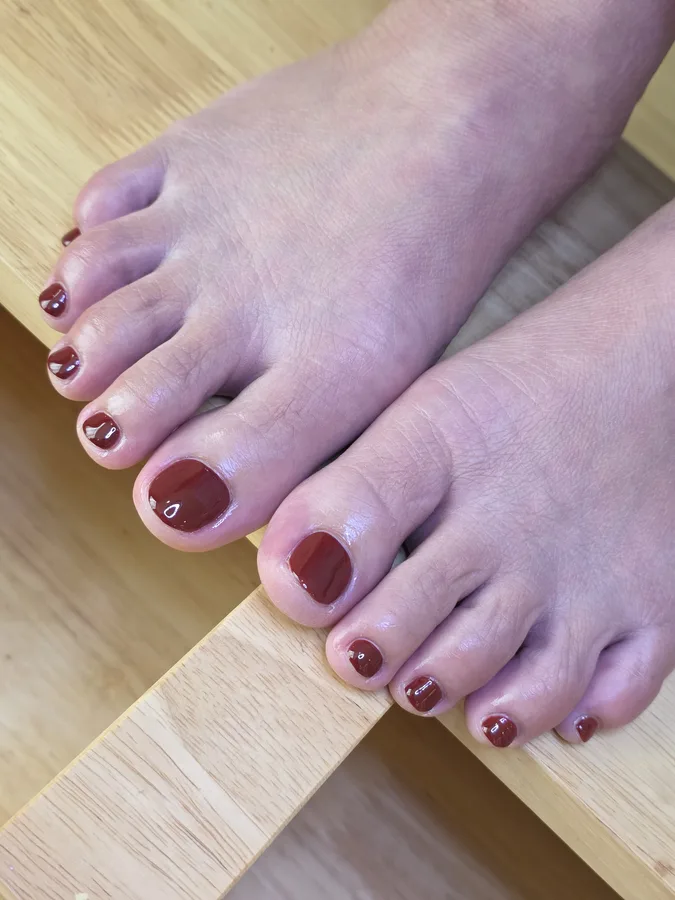
Below is burgundy gel on toenails done at our salon. Notice the even gap at the base of every toe and the smooth surface with no brush marks.
You did everything right and still want it to last longer?
Follow all seven points and regular polish will look better and last noticeably longer. But it is still a film that dries in the air. You will need to top it up with top coat and be careful with your hands all week. If you want colour that stays as smooth and glossy as day one for a long time without worrying about it, gel polish is the better value.
Gel polish does not dry by itself. It hardens when it is cured under a lamp, so the colour is harder, glossier and far more durable than regular polish. Once it is cured you can use your hands straight away, with no sitting around waiting for it to dry. How long it lasts and what shortens or extends that is covered in how long do gel nails last.
A plain colour looks simple, but it shows every step, especially a dark shade that reveals every streak and mark. Compare with the photos below.
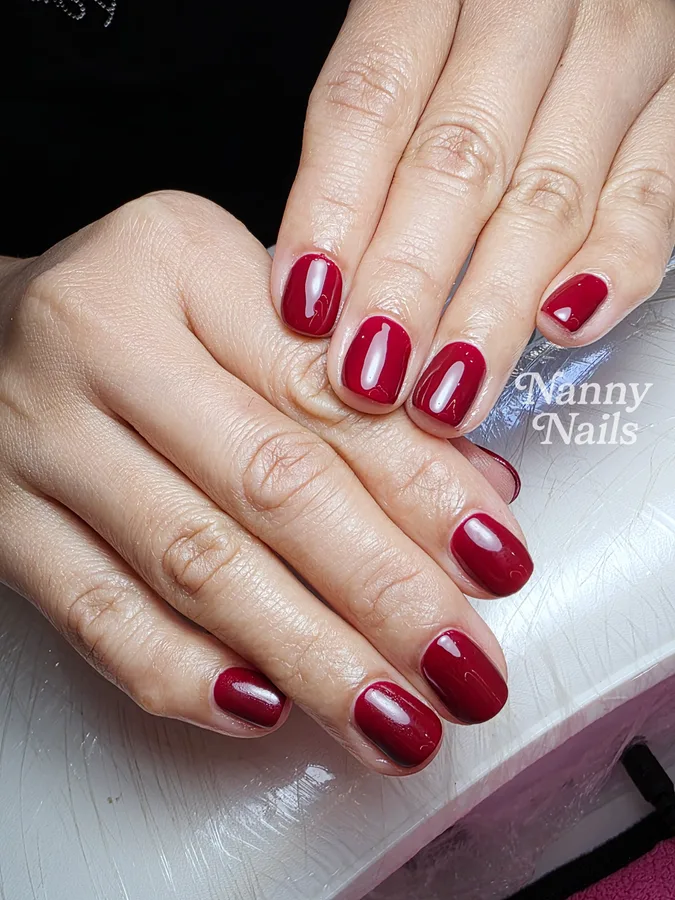
Painted at home, a burgundy like this shows brush strokes clearly. Here the edges are crisp, the surface is smooth, and every tip is neatly capped.
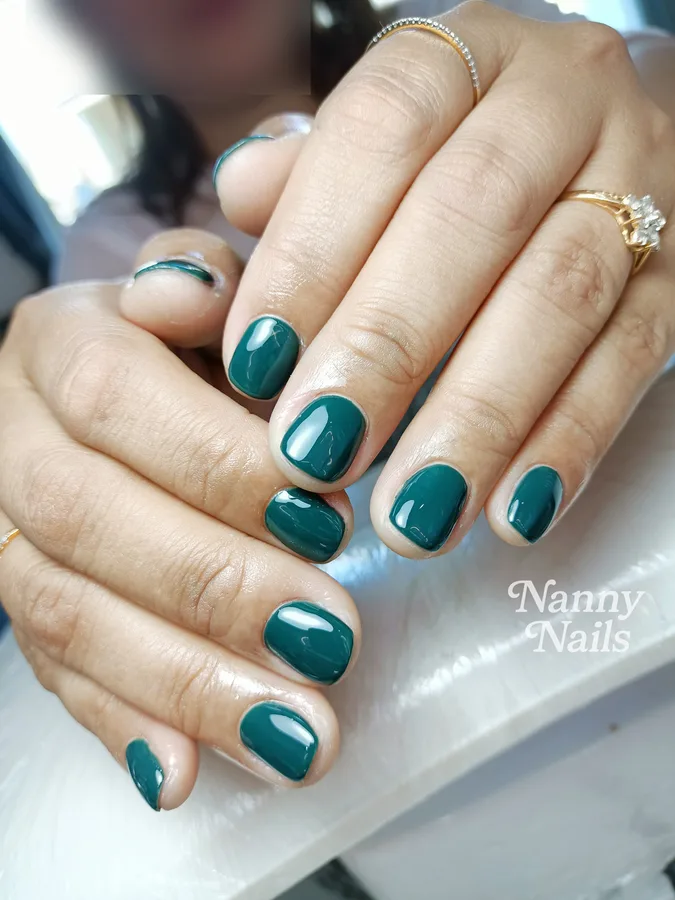
Deep green is another shade that is hard to do yourself because the pigment is so dark. The smallest smudge at the cuticle stands out.
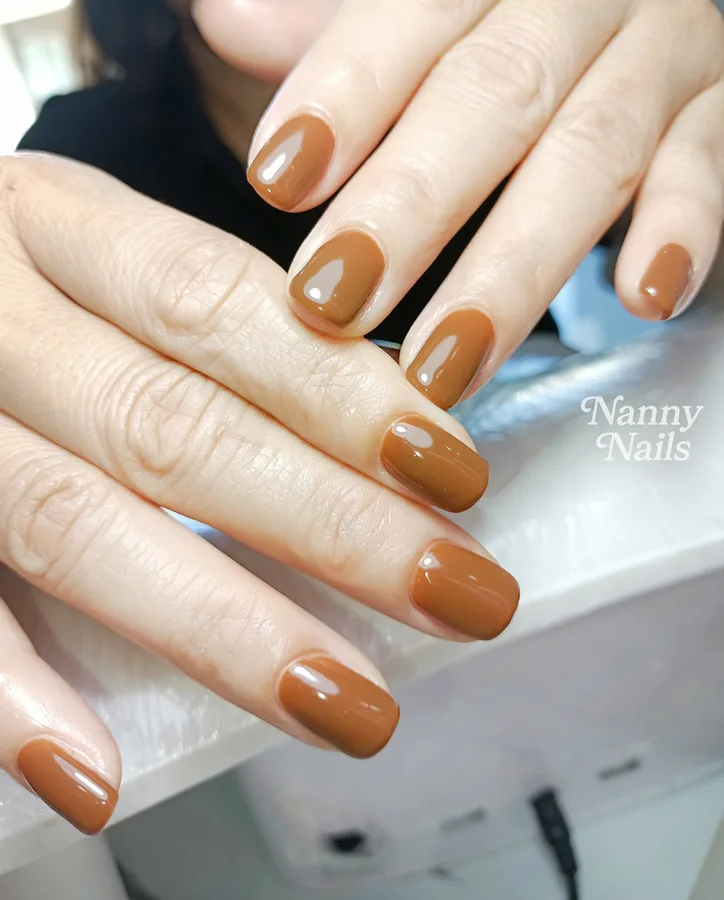
And a caramel brown like this looks lumpy if it goes on too thick. It has to be thin and even on every finger to look expensive.
At our salon every set starts with pushing the cuticle back first and only then trimming the excess skin. Every job gets a base coat before the colour, a top coat to finish, and every layer is cured under a UV lamp. We have more than 536 gel shades to choose from.
| Service | Price |
|---|---|
| Gel polish, hands, 1 colour | 200 baht |
| Gel polish, hands, 2 to 3 colours | 250 baht |
| Gel polish, feet, 1 colour | 250 baht |
| Gel polish, feet, 2 to 3 colours | 300 baht |
Prices include shaping, base coat and top coat. See the full menu on our services and prices page. Every set comes with our 7-day care period, so you can go home, wash up, work and use your hands as normal with peace of mind.
What customers say about our colour work
(A nail salon with beautiful colours. The polish goes on smooth and precise, and it does not take long. I love it, and I get my nails done every time I come to Nakhon Phanom.)Google review by CHERRY ST
(Beautiful, lovely colours, long-lasting, great work, and a lovely nail tech.)Google review by Thanapan Sangpha
Read all our reviews on the reviews page.
Next time you paint your own nails
Next time you pick up a bottle, keep these seven in mind: remove the oil first, roll instead of shaking, two thin coats, only three strokes, a gap at the cuticle, cap the tip on every coat, and give the polish time to really dry. Do all that and the streaks smooth out, the bubbles disappear, and it will not peel on day two again.
And for the days you want lasting colour without painting it yourself, browse the colours and designs our customers pick most in our gallery. Save the ones you like and send them to us.
FAQ
How do I paint my own nails without streaks?
Remove oil from the nail before painting, apply two thin coats, use only three brush strokes per coat (middle, left, right) without working it back and forth, leave a small gap at the cuticle, and cap the tip on every coat.
Why does my nail polish bubble?
Mostly from shaking the bottle hard, which whips air into the polish, and from coats that are too thick. Roll the bottle between your palms instead of shaking it and paint thin coats. If bubbles appear, wipe that nail clean and paint it again.
Why does my DIY polish peel off in a sheet?
Usually because of oil on the nail, such as hand cream applied before painting, or polish that has flooded onto the cuticle. The edge lifts, water gets underneath and the whole layer comes off. Wipe the nail with remover before painting and leave a small gap at the base.
How can I make home-painted polish last longer?
Use a base coat and top coat, cap the tip on every coat, wear gloves for the dishes, do not use your nails as tools, and add a thin layer of top coat every other day too. Trimming nails a little shorter also stops the tips chipping so easily.
Why does gel polish last longer than regular polish?
Regular polish dries by evaporating in the air, so the film is thinner and softer. Gel polish hardens under a lamp, so it is harder, glossier and more durable, and you can use your hands as soon as it is cured.
What is the salon’s 7-day care period?
If work done at the salon lifts or peels within 7 days, bring it back and we will fix it for free.
Where is the salon and how do I book?
We are in Ban Noi Tai, Soi 7/1, Mueang Nakhon Phanom. Open every day, nail appointments 09:00 to 18:00, 3 bookings a day. Book on LINE @nannynails or call +66 99 002 8935.
Want colour that outlasts DIY polish? Send us a photo
Send a photo of a colour or design you like on LINE @nannynails, or a photo of your hands as they are now. We will match the closest gel shade for you, or help you choose between a clean plain colour and a deep glossy one. We take 3 bookings a day, between 09:00 and 18:00.
Read more